
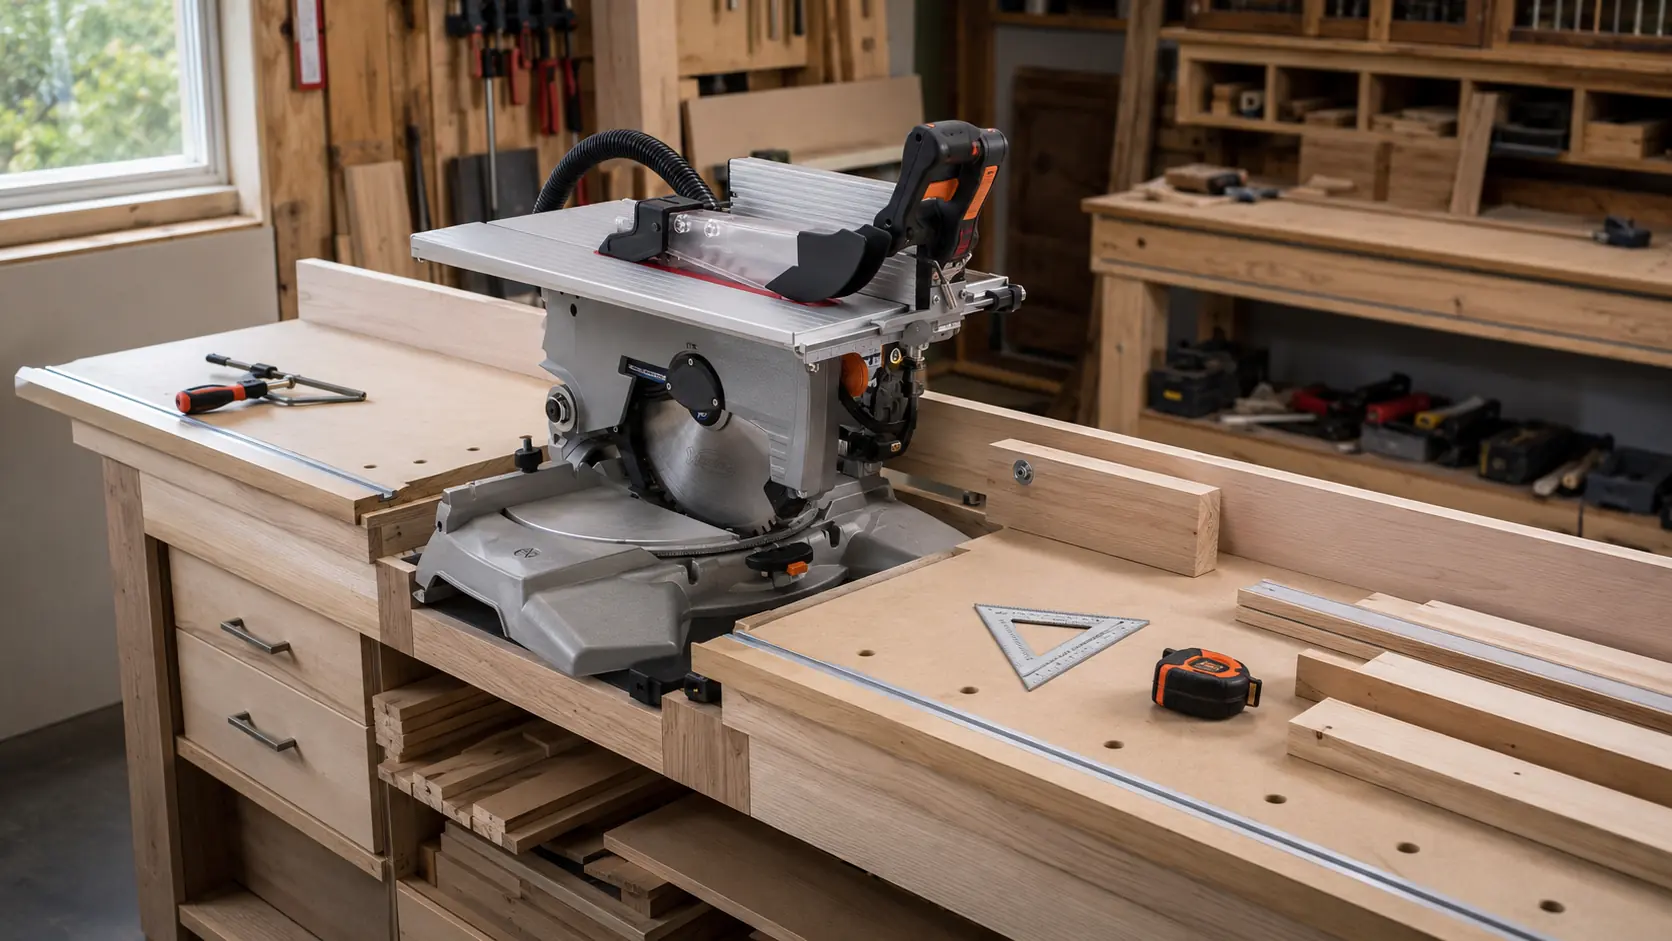
A well-designed miter saw table supports the saw, stabilizes the workpiece, improves cut accuracy, and makes repeated woodworking tasks more efficient.
An effective setup follows six principles: plan, stabilize, align, calibrate, test, and maintain.
Each principle affects the next. A calibrated saw cannot produce consistent parts if the table flexes, the board sags, or the stop block moves.
What Is a Miter Saw Table?
A miter saw table is a work surface designed to hold a miter saw and support material before, during, and after a cut.
A complete station may include extension wings, auxiliary fences, measuring scales, stop blocks, clamps, dust collection, lighting, and storage.
Miter Saw Table, Stand, Bench, and Workstation
- Miter saw table: a surface that supports the saw and workpiece
- Miter saw stand: a portable or folding support for mobile work
- Miter saw bench: a fixed structure that holds the saw
- Miter saw workstation: a complete cutting system with support and measuring accessories
Key Miter Saw Table Terms
Coplanar surfaces are surfaces positioned in the same geometric plane.
Workpiece support is any surface or device that holds the material stable during cutting.
Outfeed support supports material extending beyond the cutting area.
An extension wing is a side surface that increases the support length of the station.
An auxiliary fence is an added reference surface used to support or position a workpiece.
A stop block is a fixed or movable reference used to produce repeated cuts of the same length.
Kerf is the strip of material removed by the width of the saw blade.
A cutoff is the section separated from the workpiece during a cut.
Miter calibration aligns the indicated miter angle with the actual cutting angle.
Bevel calibration aligns the blade tilt with the intended bevel angle.
Blade runout is unwanted lateral movement of the blade while it rotates.
Cut accuracy describes how closely one cut matches its target measurement or angle.
Cut repeatability describes how consistently the saw produces the same result across several pieces.
Choose the Right Miter Saw Table

The best station depends on available space, material length, cutting frequency, transportation needs, and the required level of repeatability.
Fixed Workshop Station
A fixed station provides high rigidity and permanent space for fences, scales, stop blocks, extraction, and long support wings.
It is well suited to cabinet components, furniture parts, baseboard, crown molding, and repeated production work.
Portable Miter Saw Stand
A portable stand is designed for jobsite work, installation, maintenance, and workshops where the saw must be stored after use.
Its legs, brackets, wheels, extensions, and locks must be checked after every relocation.
Modular Miter Saw Workstation
A modular station combines a compact saw base with removable, telescopic, or folding extensions.
This configuration provides additional support without permanently occupying the full length of a fixed workstation.
Plan the Location and Material Flow
Determine the longest, widest, and heaviest material that will normally be cut.
Reserve enough space on both sides of the blade to load, support, cut, and remove the workpiece safely.
Check the area behind the saw. Sliding rails, motors, dust hoses, and bevel mechanisms may require additional rear clearance.
Keep the Work Area Clear
- Keep cables outside the material path
- Keep hoses away from moving saw components
- Provide a clear position for the operator
- Remove loose offcuts from the table
- Prevent long boards from striking walls or stored tools
Set the Correct Miter Saw Table Height
There is no single correct miter saw table height for every operator or workshop.
The correct height depends on the user, the saw base, material weight, task duration, and required working posture.
The operator should reach the handle without excessive bending, raised shoulders, or loss of balance.
Level and Coplanar Are Different
A level surface is horizontal relative to gravity.
A coplanar surface matches the working plane of the saw table.
The support wings must be coplanar with the saw base, even when the floor or station is not perfectly level.
Build or Position a Stable Base
The table must resist movement, flexing, twisting, vibration, and tipping.
A flexible base can change the relationship between the blade, fence, workpiece, scale, and stop block.
Stability Checklist
- Lock wheels before cutting
- Lock folding legs and braces
- Tighten mounting hardware
- Adjust feet on uneven floors
- Confirm that extensions do not sag
- Check that the structure does not rock
Mount the Miter Saw Securely
Attach the saw through its designated mounting points or approved mounting brackets.
The saw must not slide, rotate, lift, or vibrate when the cutting head moves.
Keep the power switch, miter lock, bevel lock, blade-change system, guard, and dust port accessible.
Check the Full Range of Movement
Disconnect the saw from power before checking clearances.
Move the cutting head through its full sliding, miter, and bevel range.
Confirm that the blade, guard, motor, rails, clamps, fence, hoses, and table extensions cannot collide.
Align the Table Wings with the Saw Base
Place a long, reliable straightedge across the left wing, saw table, and right wing.
Adjust the supports until the straightedge contacts every surface without rocking or showing a gap.
A low wing allows the workpiece to sag. A high wing lifts the workpiece away from the saw table or fence.
Choose the Correct Support Type
- Continuous wings: provide broad and stable support
- Roller stands: reduce friction and improve portability
- Ball-transfer supports: allow movement in several directions
- Adjustable extensions: adapt to changing material lengths
Roller stands must match the height of the saw table. Incorrect adjustment can tilt or steer the workpiece.
Calibrate the Miter Saw Before Adding a Scale
Calibrate the saw before installing a measuring tape, auxiliary fence, or stop block.
A measuring system installed on a misaligned saw will reproduce the same error across every repeated cut.
Miter Saw Calibration Sequence
- Inspect the blade: check condition, installation, and suitability
- Check blade runout: look for unwanted lateral movement
- Square the blade to the fence: verify the zero-degree miter position
- Square the blade to the table: verify the zero-degree bevel position
- Check angle stops: test common miter and bevel settings
- Make test cuts: inspect the cut surfaces before final adjustment
Install an Auxiliary Fence Correctly
An auxiliary fence provides extra support for tall, narrow, delicate, or shaped material.
The fence must remain straight and firmly attached.
It must not restrict the blade, guard, motor, sliding rails, bevel movement, or dust extraction.
When an Auxiliary Fence Helps
- Supporting tall baseboard
- Holding crown molding in position
- Reducing tear-out near the blade
- Creating a reference for a stop system
- Supporting small cabinet components
Add a Measuring Scale and Stop Block
Install the measuring scale only after the saw, table wings, and fence are in their final positions.
Calibrate the scale from an actual cut line rather than from the visible side of the blade.
The blade kerf determines which side of the cut matches the target measurement.
Use Stop Blocks for Repeated Cuts
A stop block allows several pieces to be cut to the same length without measuring every workpiece separately.
The stop must remain rigid, square to the fence, and easy to position accurately.
Test several sample pieces before beginning a production run.
Avoid Trapping the Cutoff
The cutoff must not become trapped between the blade and a fixed stop.
A trapped cutoff may move, bind, rotate, or contact the blade unexpectedly.
Use the stop to locate the retained workpiece while leaving the waste section free.
Support Long, Wide, and Irregular Workpieces
Both the retained piece and the cutoff need stable support throughout the cut.
The support must remain effective until the blade has completed the cut and stopped moving.
Long and Flexible Material
Baseboard, molding, and flexible trim may sag between widely spaced supports.
Use continuous wings or several closely positioned supports to maintain a consistent cutting plane.
Wide Panels and Shelves
Wide material may require a broad support surface rather than a narrow roller.
The workpiece must remain flat against the table and firmly against the fence.
Round or Irregular Material
Round, curved, or irregular material can roll, rock, or rotate.
Use a clamp, cradle, jig, or purpose-built fixture instead of controlling an unstable shape only by hand.
Improve Miter Saw Dust Collection
A miter saw dust collection system captures part of the dust and chips created during cutting.
The factory dust port usually captures debris close to the blade.
A rear hood can collect material that escapes behind or below the cutting area.
Dust Collection Checklist
- Use a compatible dust extractor
- Keep the hose as direct as possible
- Check the filter regularly
- Remove blockages from the port
- Keep the hose clear of saw movement
- Clean settled dust around the station
Dust extraction reduces exposure and cleanup, but it does not capture every airborne particle.
Plan Lighting and Electrical Connections
Lighting should clearly illuminate the blade area, fence, scale, stop block, and workpiece.
Avoid strong shadows that make the cutting line difficult to interpret.
Route cables outside the operator path, material path, blade area, and moving components.
Use electrical connections that meet the saw manufacturer’s voltage and power requirements.
Step-by-Step Miter Saw Table Setup Guide
- Step 1: define the workpiece sizes and cutting operations
- Step 2: select a fixed, portable, or modular table
- Step 3: position and stabilize the table
- Step 4: mount the saw securely
- Step 5: align the support wings with the saw base
- Step 6: calibrate the blade, fence, miter, and bevel settings
- Step 7: install the auxiliary fence, scale, and stop block
- Step 8: connect dust extraction, lighting, and power
- Step 9: support the workpiece and cutoff
- Step 10: perform test cuts and final adjustments
Diagnose Common Miter Saw Table Problems
- Cut is not square: check the fence, blade, workpiece contact, and lateral pressure
- Repeated parts vary: check the stop block, scale, workpiece end, and support height
- Long board lifts: check for a support wing positioned above the saw table
- Long board sags: add support or raise a low extension
- Workpiece moves: improve clamping, fence contact, or material support
- Bevel angle changes: inspect the bevel lock, blade, and table stability
- Dust escapes: inspect the hose, port, filter, airflow, and rear hood
Professional Miter Saw Table Setup Examples
Fixed Station for Cabinet Components
Use a rigid bench, continuous wings, a straight fence, a calibrated measuring tape, and a secure flip stop.
Cut several samples and compare their length before beginning production.
Long-Support Station for Molding
Support the full practical length of the molding and keep the profile in the same orientation for every cut.
Use fixtures or clamps when the molding cannot rest securely against the table and fence.
Portable Jobsite Setup
Position the stand on firm ground and lock every moving component.
Align the extensions and make a test cut after transportation or relocation.
Compact Workshop Station
Use folding or removable wings that return to repeatable reference positions.
Recheck the measuring scale whenever the station layout changes.
Miter Saw Table Pre-Cut Checklist
- The table or stand is stable
- The legs, wheels, brackets, and extensions are locked
- The saw is mounted securely
- The blade and guard are serviceable
- The blade path is clear
- The wings are coplanar with the saw table
- The workpiece is firmly supported
- The cutoff can move freely
- The fence and stop block are secure
- The extraction hose and cable are clear
- A test cut confirms the required accuracy
Maintain an Accurate Miter Saw Workstation
Inspect the workstation before use and after transportation, folding, impact, adjustment, or blade replacement.
Clean the table, fence, scale, stop block, mounting surfaces, and moving components.
Retighten loose hardware and replace damaged or sagging support surfaces.
When accuracy changes, identify the cause before moving the measuring scale.
The error may come from the blade, fence, support, stop block, mounting system, workpiece, or cutting technique.
Conclusion: Create a Stable and Repeatable Cutting Station
The most effective miter saw table setup tips form one connected process.
Plan the work area, stabilize the table, mount the saw, align the wings, calibrate the blade, and install the measuring system.
Support the workpiece, control the cutoff, collect dust, complete test cuts, and inspect the station regularly.
A reliable miter saw workstation keeps the machine, support system, workpiece, and measuring references stable throughout every cut.
Frequently Asked Questions About Miter Saw Table Setup (FAQs)
The best height allows the operator to control the workpiece and reach the saw handle without excessive bending or raised shoulders.
The station should be stable, but the support wings must also be coplanar with the saw table to prevent the workpiece from tilting.
Extension length should match the longest material normally cut and provide stable support near the cutting area.
Yes. Roller stands work well when their height matches the saw table and they do not steer the workpiece sideways.
Calibrate the saw, install a rigid fence, set an accurate stop block, and verify several sample cuts before production.
Plywood provides structural strength. MDF offers a smooth surface but requires support to prevent sagging and protection from moisture.
A saw can be recessed when its table remains coplanar with the wings and all controls, vents, rails, and bevel movements remain accessible.
No. A T-track simplifies repositioning, but a rigid fence and securely mounted stop block can also provide repeatable cuts.
Check calibration after transport, impact, blade replacement, fence adjustment, or any noticeable change in cut accuracy.
No. Dust collection reduces airborne and settled debris, but regular cleaning and appropriate personal protection may still be required.


