
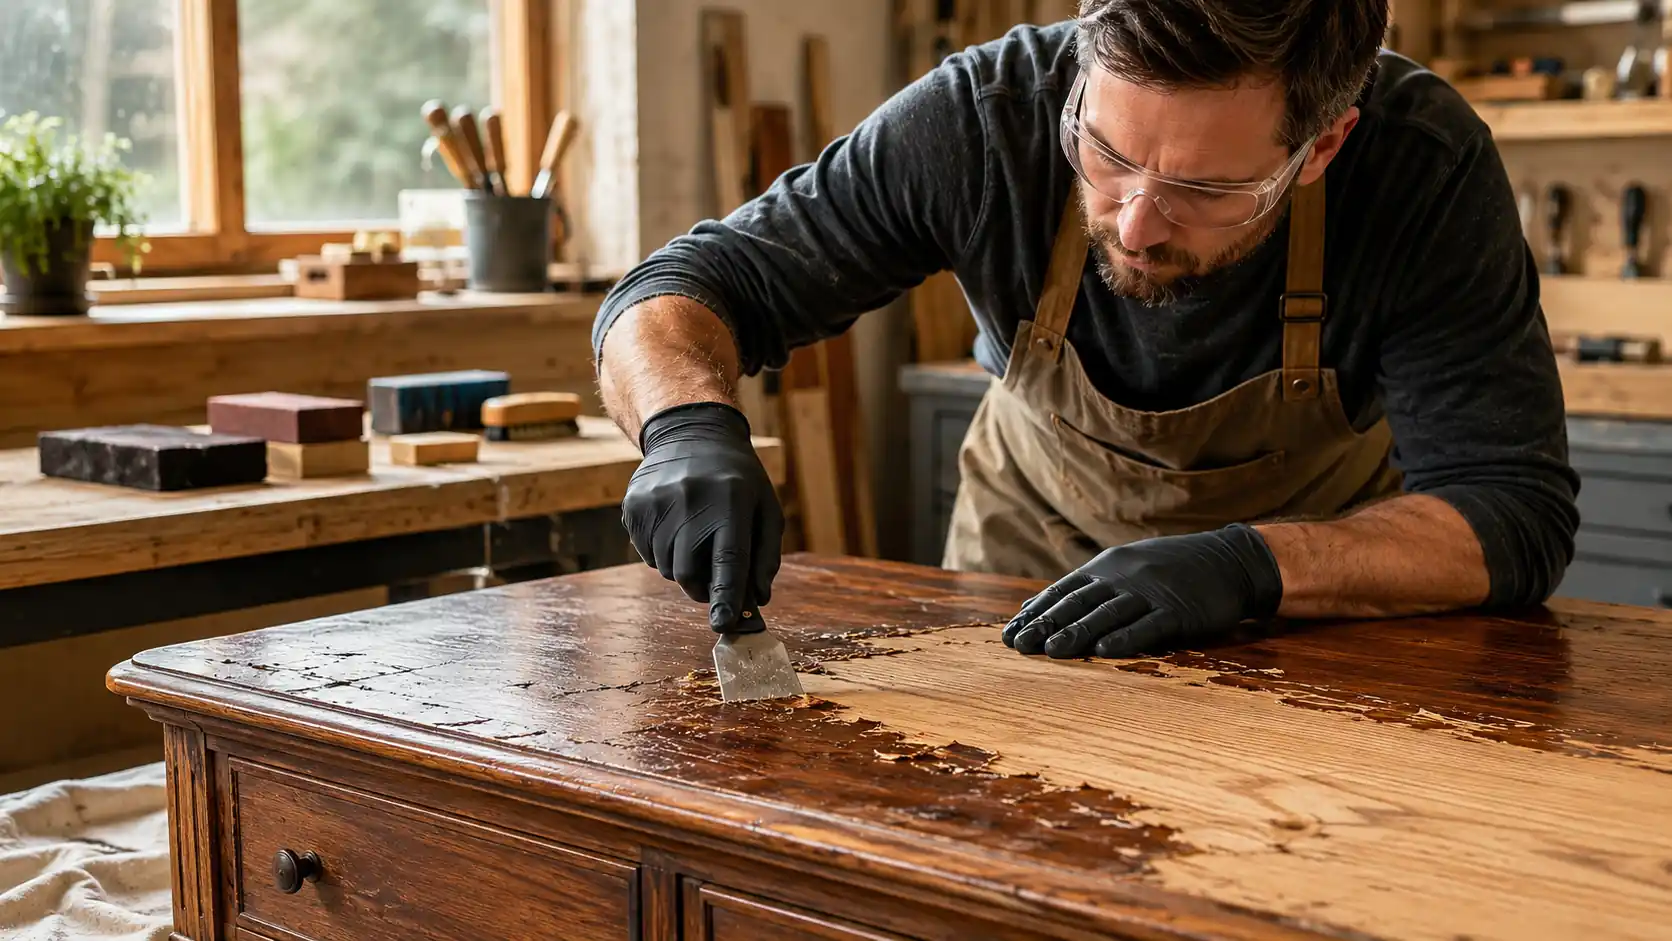
Removing old finish from wood is not simply a matter of exposing bare timber. A professional result requires identifying the existing coating, evaluating the substrate, selecting the least aggressive effective removal method, controlling health risks, and preparing a clean surface for the next finish.
Paint, varnish, lacquer, polyurethane, wax, oil, and stain behave differently during removal. A method that works well on a solid wood tabletop may damage a thin veneer, soften an adhesive, erase a carved profile, or leave contamination inside open grain.
The safest workflow follows six principles: identify, assess, protect, remove, clean, and verify. Each decision should preserve as much sound wood as possible while producing a dry, stable, and compatible surface for refinishing.
What Removing Old Finish from Wood Really Involves
Finish Removal vs. Surface Preparation
Finish removal is the process of eliminating an existing coating or penetrating treatment. Surface preparation includes everything required afterward: residue removal, drying, repairs, final sanding, dust extraction, moisture verification, and compatibility testing.
A surface can look bare while still containing wax, silicone, oil, stripper residue, embedded pigment, or moisture. These contaminants can cause blotchy stain, fisheyes, poor adhesion, slow curing, or premature coating failure.
Film-Forming vs. Penetrating Finishes
Film-forming finishes create a continuous layer above the wood. Paint, varnish, lacquer, shellac, and polyurethane generally fall into this category. They may be removed by scraping, sanding, chemical softening, or a controlled combination of methods.
Penetrating finishes enter the wood fibers rather than forming a thick surface film. Oils, waxes, and some stains may remain below the visible surface. Removing them can require cleaning, solvent-compatible treatment, and limited sanding rather than simple film lifting.
Why the Least Aggressive Effective Method Is Best
The correct starting method is the one that removes the coating while causing the least unnecessary change to the substrate. This is especially important with veneer, softwood, carved details, rounded profiles, and historically valuable furniture.
Begin in a concealed area. Observe how the coating reacts, how much pressure is required, and whether the method changes the color or texture of the wood. Increase aggressiveness only when the initial approach is ineffective.
Identify the Existing Wood Finish Before Starting
Correct identification reduces trial and error. Paint is opaque and hides the grain. Varnish and polyurethane usually form transparent, durable films. Lacquer often appears thinner and may show fine checking. Shellac can produce a warm amber tone. Wax may feel smooth or greasy, while oil normally darkens the fibers without creating a thick film.
Older furniture may contain multiple layers, including stain, sealer, paint, glaze, wax, and later repairs. A single test cannot always identify the complete finishing system.
Why a Test Area Prevents Expensive Damage
Choose an inconspicuous location such as the underside of a tabletop, the rear of a cabinet, or the interior face of a removable component. Test only a small section and allow it to dry before judging the result.
The test should answer four questions:
- Does the method soften or remove the coating?
- Does it discolor or raise the wood grain?
- Does it affect glue, veneer, filler, or adjacent materials?
- What cleaning process is required afterward?
Assess the Wood and the Main Safety Risks
Solid Wood vs. Veneer
Veneer is a thin layer of natural wood bonded to a supporting panel. It can be sanded through quickly, especially at edges and corners. Heat and aggressive solvents may also weaken the adhesive beneath it.
Solid wood generally tolerates more scraping and sanding, but excessive material removal can still change dimensions, round profiles, or expose uneven coloration.
Flat Surfaces vs. Carved or Shaped Details
Power sanding can be efficient on broad, flat surfaces. Carvings, moldings, corners, and narrow profiles usually require hand scraping, shaped abrasive pads, or carefully selected chemical stripping.
The removal method must follow the geometry. Forcing a flat machine into a shaped profile can erase detail before the old coating is fully removed.
Lead Paint and Other Hazardous Coatings
Old painted doors, windows, trim, and furniture may contain lead. The U.S. Environmental Protection Agency reports that approximately three-quarters of U.S. housing built before 1978 contains some lead-based paint.
Paid renovation work that disturbs paint in covered pre-1978 homes and child-occupied facilities may fall under the EPA Renovation, Repair and Painting Rule. Contractors should verify certification, containment, cleaning, and recordkeeping requirements before beginning work.
Homeowners working on their own property should also follow lead-safe practices or use an appropriately certified professional. Do not create sanding dust or apply uncontrolled heat until the coating has been assessed.
Dust, Vapors, and Respirator Selection
NIOSH identifies wood dust as a respiratory and skin hazard. Mechanical removal should use source extraction, controlled cleanup, eye protection, and respiratory protection selected for the actual exposure.
A NIOSH-approved respirator is not automatically suitable for every hazard. Particulate filters address dust, while chemical vapors may require different cartridges and controls. Lead, wood dust, and solvent vapor can require different protection strategies.
Chemical and Fire Safety
Read the product label and safety data sheet before using any stripper, cleaner, solvent, or finish remover. Confirm ventilation requirements, glove compatibility, eye protection, ignition controls, and disposal instructions.
Do not select methylene chloride-based paint removers. EPA has prohibited consumer distribution for paint and coating removal and has prohibited most commercial and industrial uses, subject to limited regulated exceptions.
Mechanical Methods for Removing Old Finish from Wood
Sanding Old Finish from Flat Wood Surfaces
Sanding is most appropriate for thin, failing coatings on flat, stable surfaces. It removes both finish and wood, so control is essential.
Start with the finest abrasive that removes the coating at a reasonable rate. Move progressively to finer grits rather than making a large jump. Keep the sander flat, avoid lingering in one area, and inspect frequently under side lighting.
Sanding is less appropriate when the surface has thick paint, deep profiles, lead-containing coatings, fragile veneer, or a patina that should be preserved.
Using Scrapers for Controlled Finish Removal
A sharp cabinet scraper removes material by cutting rather than grinding. It can lift brittle varnish and residual coating while producing less airborne fine dust than aggressive sanding.
Use light passes with the grain. A plastic scraper may be safer for softened coatings or sensitive surfaces, while a properly prepared metal scraper offers greater control on sound solid wood.
Stop scraping when the remaining material is too thin to remove without cutting into healthy fibers.
How to Use Chemical Wood Strippers Safely
Chemical stripping softens a film so it can be lifted with limited abrasion. It is useful for multilayer paint, carved details, moldings, and surfaces where sanding would remove excessive wood.
Choosing a Stripper for the Existing Coating
Select the product according to the coating, substrate, workplace, and subsequent finishing system. A product formulated for paint may behave differently from one intended for varnish or polyurethane.
Dwell time is the period a chemical stripper must remain on the coating before removal. Follow the labeled interval rather than assuming that longer exposure always improves performance.
Applying and Removing Chemical Stripper
- Prepare: protect adjacent surfaces and establish ventilation.
- Apply: spread a consistent layer without unnecessary brushing.
- Wait: allow the stated dwell time.
- Lift: remove softened finish with a suitable scraper.
- Repeat: reapply to resistant areas instead of forcing them.
- Collect: place removed material in a compatible container.
Cleaning vs. Neutralizing the Surface
Cleaning removes residue and contamination. Neutralization is a product-specific chemical procedure used only when directed by the manufacturer.
Some strippers require water, some require a solvent-compatible cleaner, and others require no separate neutralizer. Using the wrong liquid can raise the grain, spread contamination, weaken veneer adhesive, or interfere with the next coating.
Heat-Assisted Finish Removal
A heat gun can soften certain paint and coating films, allowing them to be scraped away. Heat removal produces less sanding dust, but it introduces different hazards.
Excessive heat can scorch wood, release fumes, ignite nearby material, soften glue, loosen veneer, and damage fillers or assembled joints. Keep the tool moving and use only the minimum temperature needed to soften the coating.
Avoid heat on suspect lead paint unless the work is performed under applicable lead-safe procedures. Never use an open flame to remove a wood finish.
Mechanical vs. Chemical vs. Heat Finish Removal
Method Selection Guide
- Sanding: best for thin coatings on broad, flat solid wood; main risk is removing wood or rounding edges.
- Scraping: best for brittle films and controlled local removal; main risk is gouging or cutting against the grain.
- Chemical stripping: best for multiple layers and detailed profiles; main risks are exposure, residue, and material incompatibility.
- Heat-assisted removal: best for selected paint films on suitable solid substrates; main risks are fire, fumes, scorching, and adhesive damage.
Many professional projects require a combined approach. A stripper may remove the main coating, a scraper may lift residue, and light sanding may prepare the exposed fibers.
Step-by-Step Guide to Removing Old Finish from Wood
Step 1: Identify the Finish and Inspect the Wood
Determine whether the surface is painted, film-coated, waxed, oiled, stained, or built from several layers. Identify veneer, repaired areas, hardware, carvings, and glue joints.
Step 2: Test the Least Visible Area
Use the least aggressive likely method. Evaluate coating response, wood condition, drying behavior, and cleanup requirements.
Step 3: Prepare the Workspace and Safety Equipment
Control dust, vapors, ignition sources, and access to the work area. Protect floors and adjacent materials. Prepare extraction equipment, compatible waste containers, and hazard-specific personal protective equipment.
Step 4: Remove the Finish in Controlled Sections
Work on manageable areas. Maintain consistent timing and technique so one section is not overexposed while another remains untreated.
Step 5: Clean Remaining Residue
Follow the stripping product instructions. Remove softened coating from pores, corners, and profiles without flooding sensitive wood or veneer.
Step 6: Allow the Wood to Dry and Stabilize
Drying time depends on the cleaner, wood species, thickness, airflow, humidity, and construction. Do not judge readiness only by surface touch.
Step 7: Repair and Sand the Exposed Wood
Repair loose veneer, damaged fibers, open joints, and dents. Sand only enough to remove raised grain, scratches, and minor residue while preserving dimensions and profiles.
Step 8: Verify Compatibility Before Refinishing
Test the complete new finishing system on a representative area. Include stain, sealer, and topcoat when they will be used together.
How to Prepare Stripped Wood for a New Finish
Remove Wax, Silicone, Oil, and Chemical Residue
Surface contamination is any substance that interferes with the absorption, wetting, curing, or adhesion of the next finish. Wax, silicone, oil, grease, and chemical residue are common examples.
Fisheyes, separated coating, or areas that refuse to wet uniformly usually indicate remaining contamination.
Choose the Correct Sanding Sequence
The sanding sequence depends on the species, existing scratches, intended color, and new finish. Sanding too coarsely leaves visible marks. Sanding too finely can reduce stain absorption on some woods.
Work with the grain, protect crisp edges, and remove dust using extraction and a cleaning method compatible with the new coating.
Control Grain Raising and Moisture
Grain raising occurs when moisture causes cut wood fibers to swell and stand above the surface. If an aqueous cleaner or water-based finish will be used, a controlled grain-raising step may help produce a smoother final result.
The USDA Forest Products Laboratory explains that wood properties, surface condition, moisture, finish type, and environmental exposure interact to determine finish performance.
How to Know When Wood Is Ready for Refinishing
A wood surface is ready for refinishing when the previous coating and incompatible contaminants have been removed, the substrate is dry and stable, and a test application shows uniform wetting, absorption, and adhesion.
Ready-to-Refinish Checklist
- No glossy or coated patches remain where bare wood is required.
- The surface is not tacky, soft, greasy, or chemically odorous.
- Carved details and edges retain their intended geometry.
- The wood absorbs the test product uniformly.
- Moisture conditions are stable for the intended environment.
- No wax, silicone, oil, or stripper residue is detected.
- The complete test finish cures and adheres correctly.
Common Finish Removal Problems and Corrections
- Blotchy stain: likely caused by uneven sanding, residual finish, or variable absorption; clean, resand consistently, and retest.
- Fisheyes: commonly associated with silicone, wax, or oil contamination; stop coating and clean the surface.
- Raised fibers: often caused by water exposure; allow drying and sand lightly with the grain.
- Visible scratches: caused by coarse abrasive marks or cross-grain sanding; return to the appropriate grit sequence.
- Peeling topcoat: may indicate residue, moisture, or incompatible products; remove the failed area and test the complete system.
- Damaged veneer: caused by excessive sanding, heat, or scraping; stop removal and assess whether professional repair is required.
Professional Examples of Safe Finish Removal
Removing Varnish from a Solid Wood Table
Inspect the table for veneer, repairs, and unstable joints. Test scraping and chemical softening under the top. Remove the bulk varnish with the least aggressive successful method, clean according to the product instructions, allow stabilization, and sand lightly before testing the new finish.
Stripping Paint from a Detailed Cabinet Door
A painted carved door is a poor candidate for aggressive machine sanding because abrasives can flatten the profile. After assessing lead risk, apply a suitable stripper in controlled sections, lift the coating with shaped tools, clean recesses carefully, and preserve sharp decorative details.
Preparing a Veneered Panel
Confirm the veneer condition before working. Avoid prolonged heat and heavy sanding. Use a tested chemical or manual method that limits abrasion, prevent excessive liquid from reaching the adhesive layer, and complete final preparation with minimal hand sanding.
Safe Disposal and Cleanup After Finish Removal
Separate dry dust, paint debris, stripper residue, used abrasives, disposable protective equipment, and contaminated rags. Follow the product label and applicable local waste regulations. Never pour finish-removal waste into a drain or onto the ground.
Solvent-contaminated materials should be stored only in compatible containers. Rags containing drying oils can generate heat as the oil oxidizes and must be managed according to the product instructions and local fire-safety requirements.
Conclusion: From Old Finish to a Clean, Stable Surface
Professional finish removal follows a repeatable sequence: identify the coating, assess the substrate and hazards, select the least aggressive effective method, protect the operator and workspace, remove the coating in controlled stages, clean the residue, allow the wood to stabilize, and verify compatibility.
The purpose of removing old finish from wood is not merely to expose the grain. The objective is to produce a clean, dry, dimensionally sound surface capable of accepting a new finishing system without contamination, adhesion failure, or unnecessary damage.
FAQs About Removing Old Finish from Wood
A chemical stripper followed by controlled scraping is often effective for thick varnish. Thin or failing varnish on flat solid wood may be removed by careful scraping and sanding.
Yes. A compatible chemical stripper can soften polyurethane so it can be scraped away. Light sanding is usually still needed for final surface preparation.
Drying time depends on the product, cleanup method, wood species, humidity, and ventilation. Follow the manufacturer’s minimum interval and verify that the wood is dry and stable before refinishing.
No. First remove all residue, allow the wood to dry, complete final sanding, and test stain absorption in a concealed area.
Use the least aggressive tested method, limit liquid and heat exposure, scrape gently, and sand minimally to avoid cutting through the thin face layer.


